


THURSO SURF inflatable paddle boards are extremely durable and designed to withstand heavy use. Despite this fact, there's always the slight possibility that your board could develop a small air leak at some point in the future.
The short answer: if your iSUP springs a leak, you can patch it yourself and be back on the water fast. Every Thurso Surf iSUP ships with a repair kit (PVC patch material and a small brush), so all you'll need to add is glue - which isn't included but is inexpensive and easy to find. Unlike a hard board, there's no costly, time-consuming shop repair required.
One of the big advantages of inflatable SUPs is that they are so easy to repair. Unlike hard boards, which require costly and time consuming shop repairs, you can quickly and easily patch your own board and be right back on the water in no time.
Contents
- If It's a Seam Leak, Talk to Us First
- STEP 1: Safety first.
- STEP 2: Purchase glue.
- STEP 3: Partially inflate your board to 7-10 psi.
- STEP 4: Apply soapy water to the area where the suspected leak is located.
- STEP 5: Mark the leak area with pencil.
- STEP 6: Clean area thoroughly.
- STEP 7: Place the patch over the leaking area and cut to size.
- STEP 8: Apply glue to both the patch and the area inside the traced line on your board.
- STEP 9: Allow to dry.
- STEP 10: Carefully place the patch over the damaged area.
- STEP 11: Smooth out excess glue and air bubbles.
- STEP 12: Clean off excess glue.
- STEP 13: Allow the repair to dry.
- Preventing Further Leaks
- Roll Up and Store Properly
- Research Where You Paddle
- Careful When You Handle Your Board on Land
- Conclusion
Every THURSO SURF iSUP comes with an inflatable paddle board repair kit which includes PVC patch material and a small brush for applying the glue. Due to government regulations, adhesive is not included in the repair kit but it is inexpensive and readily available.
In this article, we'll show you all steps in the iSUP repair process. While repairing your inflatable paddleboard may seem like an intimidating task at first, you'll quickly see just how simple it is.
iSUP Repair Guide
In this article, we're going to walk you through how to repair your paddle board should it spring a leak. As with anything else, it is crucial you follow these instructions step-by-step. You should be able to make your board as good as new, but you must follow the instructions precisely.
Take note of the following steps and you'll be back paddle boarding in no time.
STEP 1: Safety first
The process of repairing an inflatable paddle board leak involves the usage of very strong chemicals. We highly recommend that you perform the repair in a well-ventilated, outdoor area. Also, since you will be handling glue and cleaning agents, it's best to use a pair of rubber gloves to avoid contact with your skin.
Be aware of any safety recommendations or usage requirements with any of the products that you use to repair your stand up paddle board. Read the directions carefully and concisely before using, and take extra caution.
STEP 2: Purchase glue
There are a wide variety of glue options that have been specifically designed for iSUP repairs. After selecting and purchasing the glue, be sure to read the instruction label to familiarize yourself with the product's application details. The one we use is called MEK (Methyl Ethyl Ketone).
STEP 3: Partially inflate your board to 7-10 psi.
Before you address the leak, you're going to need to find out where it actually is. For this, we use a method where we use the hand pump (or an electric pump) to partially fill the inflatable board. This makes it much easier to find target areas.
So in order to pinpoint the exact location of the leak, partially inflate your iSUP to 7-10 PSI. It's important to do this before moving on to step 4.
STEP 4: Apply soapy water to the area where the suspected leak is located
After partially inflating your board, apply soapy water to the area where you suspect the air leak is located. If a leak is present, the soapy water will begin to bubble up in that area, making it easy to find the exact spot requiring a repair.
This is a neat little trick, and much easier than searching your inflatable SUP board for the source of the leak.
STEP 5: Mark the leak area with pencil
Using a pencil, mark the area on your board that is leaking air. This makes sure that you won't lose track of this area later, which is surprisingly easy to do.
STEP 6: Clean area thoroughly
Apply acetone or alcohol to the entire surrounding area that requires repair to clean it thoroughly. Keep in mind that this is strong stuff, so remember to wear gloves and work in a well-ventilated area. Once again, follow all directed safety requirements in the instructions.
STEP 7: Place the patch over the leaking area and cut to size
Next, take a piece of patch material that's included with your THURSO SURF iSUP repair kit and place it over the leaking area on your iSUP.
Before marking the patch with your pencil and trimming to size, it's important to note that the patch should extend in a circle approximately three inches beyond the source of the leak in all directions. This ensures that you have completely covered the leak, and you are able to keep the patch secure after fixing.
Once you've got the patch trimmed and placed in the optimal position on your board, grab your pencil again and trace around the edge of the patch - this will show you exactly where to apply the glue in step 8.
STEP 8: Apply glue to both the patch and the area inside the traced circle on your board
Using the small application brush that is included with your THURSO SURF repair kit, apply the iSUP repair adhesive that you purchased to the matte side of the patch and the area inside of the traced circle that you drew on your board.
Apply the glue carefully, doing your best to stay inside the traced circle as this will minimize mess and required cleanup.
Remember, this glue is oftentimes extremely strong. It is pretty important to secure the glue correctly on your first go. For this reason, you might want to get accustomed with how to use this glue beforehand, and follow the instructions carefully on a practice run.
STEP 9: Allow to dry
Following the instructions that came with your repair adhesive, allow both areas where you applied the glue to dry. Once the required drying time has passed, proceed to the next step.
STEP 10: Carefully place the patch over the damaged area
Using the traced circle as your guide, carefully place the repair patch onto the area and lay flat. Apply the patch slowly, starting at one edge and working your way all the way to the other side. As you lay the patch down, make sure that it is completely flat and that there are no air bubbles under the surface.
STEP 11: Smooth out excess glue and air bubbles
Next, use a spoon or other blunt object to smooth out any excess glue or air bubbles that are trapped underneath the patch. Work in all directions, starting at the center of the patch and moving outward to the edges.
STEP 12: Clean off excess glue
Grab the cleaning agent that you used for step 6 and apply it to the repaired area to remove any excess glue. This is the final step of the repair process, and the end result should be a neat, clean patch that is securely glued to your board.
STEP 13: Allow the repair to dry
Last but not least, be sure to give your newly repaired board 24 hours to dry before fully inflating it. After a period of 24 hours has passed, your board should be airtight once again and ready to use.
As you can see, it's a pretty simple process, but it definitely requires precision. So long as you follow these instructions carefully, we are confident you will be fine and you can rectify the issue!
Preventing Further Leaks
Now that we have examined how you can fix leaks with your inflatable paddle board, we're going to check out an even better method of maintenance - preventing them in the first place! That's right, the best method for handling leaks is to not get them in the first place.
Our iSUPs are strong and durable, and we stand behind our products fully. They are able to handle all types of regular wear and tear, and we are confident you will be satisfied with their durability. That being said, mistakes do happen, but here's how you can prevent them from happening more often:
RELATED: 8 Things You Should NOT DO with Your Paddle Board
Roll Up and Store Properly
Of course, the number one tip we can offer is to fully read the instructions provided as to the proper handling, storage, and inflation of your board. These were designed with proper care in mind, and help to avoid any issues that may occur during transit or during storage. If you take care to properly handle your board, you will be rewarded with far less problems over time.
Be sure not to roll your board too tight as well, as it can put unnecessary stress on the seams.
RELATED: 10 Tips for Inflatable SUP Storage
Research Where You Paddle
Some areas and bodies of water present more hazards and have potential leak-causers than others. Things such as shallow water, harsh coast lines, and sharp rocks or barnacles can all cause damage to your board, and potentially cause a leak.
The best advice is to know about the conditions beforehand. Use weather reports, online resources, and local advice to avoid areas that could harm your board (or you!). Knowing which areas are safe for your board are also generally the areas that are safe for you. Because anything that is strong enough to puncture a board is probably not located in an ideal place to paddle board!
Careful When You Handle Your Board on Land
There's also the potential to damage your board on land. Take extra care to not drag it across rocks or gravel, or any barnacles you might find near the shore. Ideally, you want to take it right out of the water to a safe location.
If It's a Seam Leak, Talk to Us First
One honest caveat before you start gluing: a leak along the seam - where the deck or hull meets the side rail - isn't a driveway repair. On our current boards, from the Waterwalker 120 up to the Expedition 150, those rails are joined with welded seams, not glued ones. That's a bond built into the board's structure, and a patch laid over the outside usually won't hold. A botched attempt can also make a proper fix harder later, so if your bubble test points to the seam, don't force it.
Get in touch with us instead. Every Thurso Surf inflatable carries a 2-year Manufacturer's Limited Warranty from the date of purchase, covering defects in workmanship and materials - which is exactly what a seam failure is. Send us a repair request through the warranty page at thursosurf.com/warranties and we'll sort it out with you. We'd rather do that than watch a patch peel off on the water.
A body puncture you can absolutely handle yourself, and we've shown you how. A seam is ours to handle with you.
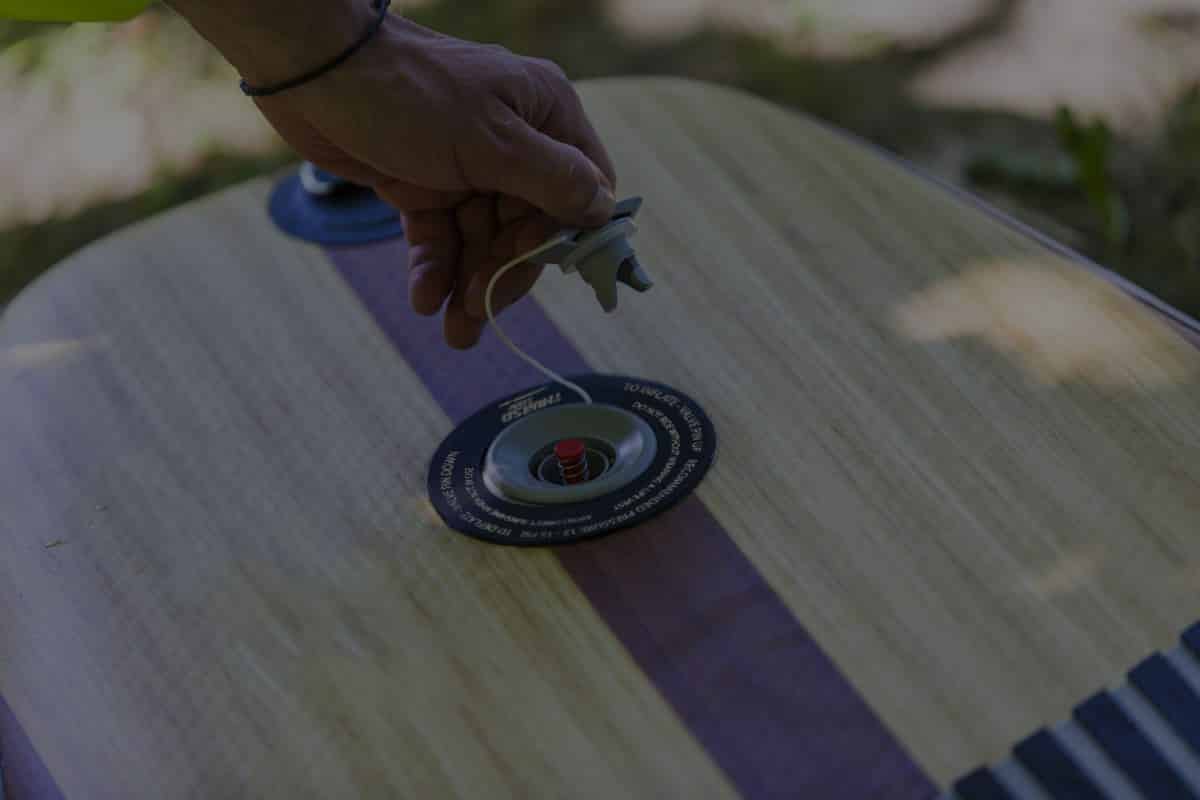
Check the Valve Before You Patch Anything
Here's the part most repair guides skip: a board that goes soft overnight often doesn't have a hole at all - it has a valve that's worked loose or caught a grain of sand. So check it first, before you cut a single patch. Pop off the valve cap and look at the base. Most iSUPs ship with a small valve wrench - the little plastic tool in your kit - and a gentle turn clockwise to snug the valve base fixes a surprising number of "leaks." If it still hisses, grit has probably lodged against the O-ring: open the valve, give it a quick burst of air to blow the dirt out, check that the rubber seal is clean and seated, then run the soapy-water test again. If the bubbles are gone, you're done - no glue, no cure time, back on the water the same afternoon.
And if a snug valve and a clean seal still won't hold air, don't reach for the glue yet. On a Thurso Surf board like the Waterwalker 120 - a 22.5 lb, 190 L all-around that runs $349 board-only, or $549 as a complete ready-to-paddle kit - a leaking valve within the first couple of seasons is exactly what the 2-year manufacturer's warranty is there for. A defective valve is a workmanship issue, not a wear-and-tear patch job, so it's worth a warranty check before you commit to a repair you might not need to make.
Conclusion
We at THURSO SURF hope that this step-by-step iSUP repair guide has been helpful. As you have seen, the process of repairing an inflatable SUP leak is super simple and something that literally anyone can do. There's absolutely nothing to be intimidated about, and you'll be back on the water in no time!
TIP: Before you begin the task of repairing your board, it's a good idea to read through the above steps one more time just to ensure that you fully understand each part of the process. Also, please remember to work safely by performing all repairs in a well-ventilated area while wearing rubber gloves.


Leave a comment